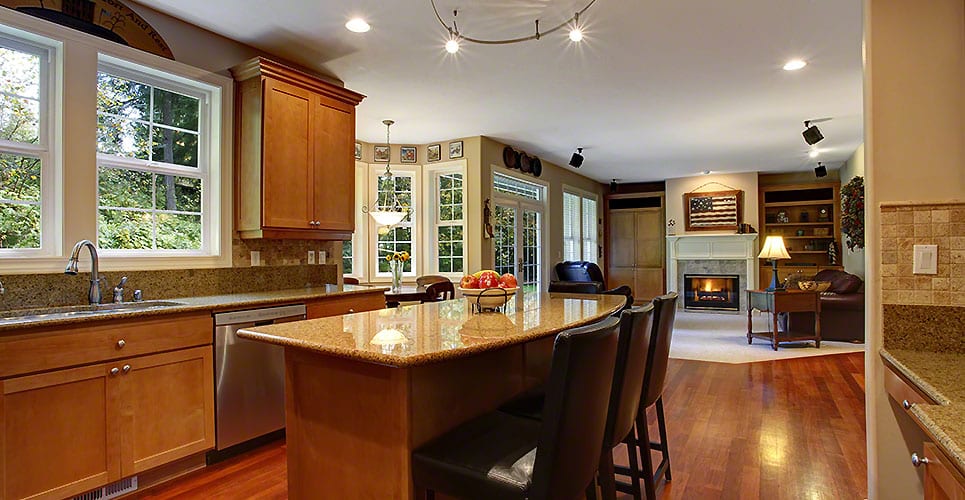
Granite countertops are loved by almost everyone out there, but does it mean that everyone can afford them? Well, if you’re a sucker for that beautiful natural stone, then here is a way by which you can make your countertops look like granite countertops.
How To Make Your Countertop A Faux Granite Countertop?
Faux granite countertops are easier to achieve than you think. You can certainly transform your old countertops into granite countertops and it works for almost all kinds of countertop surfaces.
There are a ton of granite painting kits available that can be used to make your countertops look like granite countertops and they’re a breeze to use. If you’re looking for a quick and easy project to do over the weekend, then this is for you.
Step By Step Process Of Making Faux Granite Countertops?
Here is a step-by-step guide on how to paint your countertops to make them look like natural stone countertops without spending much money. Even though it is relatively simple, you still want to take things slowly because the last thing you need is the countertops to have a splotchy look.
Things You’ll Need
Here are the things that you’ll need for making faux granite countertops by yourself.
- Granite paint kit
- Masking tape
- Sandpaper
- Buffer
- Primer
- Roller brush
- Sponge
- A shallow dish
- Tissues, napkins and overalls
Here’s how to apply the paint on your countertop. Make sure your countertop doesn’t have cracks or is damaged. If that’s the case, consider countertop replacement Raleigh NC.
Remove Everything
First things first, you need to clear out your kitchen and countertop surfaces. There shouldn’t be anything present on the countertops, because you need the whole space to be clutter-free for the DIY project to look flawless.
So, if you keep appliances or other utensils on your countertops, then remove them and set them aside elsewhere. Also, it’s better to cover the surrounding area with either a tarp or plastic, because you don’t want paint splattering everywhere. The clean-up process will be easier, if you take these precautions, ahead of time.
Get Your Things Ready
Nothing is worse than going to and from the workstation to grab all of your things. The momentum is ruined and if you don’t have all of your things in close vicinity, then the results can vary as well, since drying time can cause a lot of problems.
So, before getting your hands dirty, keep gather everything you will need. You can make a small list and tick off everything that you’ve got and once you have everything for the project, you can get started.
Clean The Countertop
Since the countertops are your workstation, there can be food spills, dirt, grime, and oil all over them, so before you start to paint, you must clean your countertop first. The primary thing to do is to grab a wet washcloth drenched in a soapy solution, and wipe down the surface of your countertops.
This is going to remove any grime, spills, or dirt from the surface, preparing the countertops for the next step. Make sure that after every speck of dirt is removed, you’re going over the surface with a dry washcloth to ensure that every square inch of the surface is dry and ready to go.
Sand Down The Surface
Sanding is a critical step of painting any surface. Sanding exposes the rough side of the countertop and the paint will adhere so much better. Additionally, sanding also gets rid of any obvious dried food stains and residue that isn’t removed by the washcloth prior.
You can use a sandpaper or a buffer with a sanding attachment. It will get the job done quickly and you’ll have an even and fine surface in no time, which is ready for the paint.
Prime The Countertops
We’re almost there, but before the actual paint coat, you must apply a primer on the surface of the countertops first.
Primer is really important for any paint job because it also allows the paint to adhere better and the result is long-lasting paint. If you normally paint without a primer, then you need to try it out, because the results are super professional and you’ll never want to go back.
Pour out some primer in a shallow paint dish and using a paintbrush or a roller brush, apply a coat of primer in a thin and even layer. Once you let the primer dry, it’s finally time for the fun stuff.
Apply The Paint
Granite paints are available in a lot of colors, but it’s suggested that you go for the traditional dark colors because they give the closest results to the real deal and the dark color will cover every speck of the older countertops, so that’s a plus.
The first coat is usually called the base coat and it’s an even layer of paint. Apply it in the same way as the primer and leave it to dry for a few hours. Then, you can apply a second coat. It’s all about going slow and applying the paint in thin coats. You don’t want the paint to look bumpy or uneven.
The “Granite” Effect
The next step, after the two coats of paint have dried completely, is the stamping of the granite pattern and it’s really fun. All you need for this is a sponge with a lot of holes in it. Sometimes, there’s a thin cloth that also comes with the painting kit, so you can use it as well.
Pour out the lighter paint that’s meant for the veining and patterns of granite countertops bunch the cloth in your hand and dip it in. Now, the best way to get the authentic granite effect is to do a couple of practice strokes first on a piece of paper.
Once you get the hang of it, then you can stamp the paint on the actual countertops. Just don’t think too much and go for it. The messier, the better. Just make sure that everything is spaced out because you still want the darker base color to peek through the stamps. Repeat the same process with some white and gray paint and you’re good to go.
Polish & Top Coat
Once the stamps are dry, you can go ahead and apply a finishing glossy top polish, which is also called a glaze, and then you can seal the deal with a clear top coat. Ta-da! Your hard work has paid off and now you have a countertop that looks like granite, and that too after spending less than $100.
All that is left to do is to wait for the whole thing to completely dry before you can use it again. Typically, you want to wait for about 24 to 48 hours for everything to set in place.
Conclusion
Faux granite countertops in just easy-to-follow steps and the best part? This project won’t cost you an arm and a leg. So, put on your DIY hat and get started. If your countertop is damaged or you need a new countertop on a budget that looks like granite, choose faux granite countertops NC. However, if you’re remodeling to sell your house and want the best ROI, install real granite countertops.


